
Tools for Online Training and Conference Presentations
Conference talks, training classes, interviews all moved online thanks to COVID. You might have seen that friend on Twitter that has literally a production quality studio at home. However, before you get your wallet out, let me show you some free tools that can give a facelift to your online conferencing presence.
OBS Studio
OBS is very popular among streamers hosting shows on Youtube and twitch. Recently, OBS received a new feature called Virtual Webcam. It creates a software-based webcam on your PC that you can pick from any conferencing tool you can imagine, Zoom, Teams, Skype, and so on. Once you install OBS, my first suggestion is to enable Studio Mode (1) to have a backstage where you can configure things and transition to the live stream when needed.
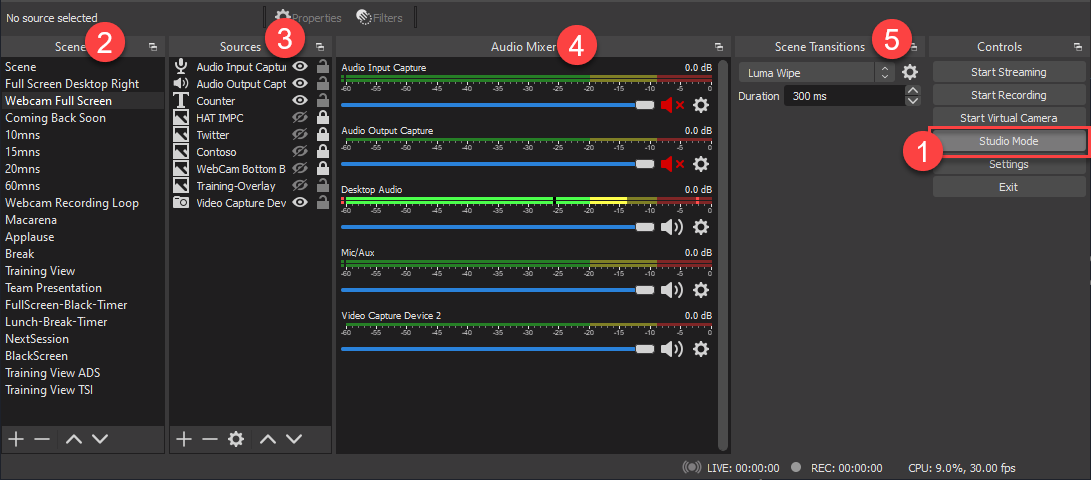
Let's discuss every section shown in the above screenshot. Scenes (2) lists different setups that you might want to store and transition between. For example, in my case, Webcam Full Screen is a scene setup where I have my webcam full screen. Full Screen Desktop Right has my right desktop full screen with my webcam input in the form of PIP (Picture-in-Picture). You will need to set up your scenes in OBS; the ones listed in the screenshot are mine :)
The Sources (3) listing shows the sources used in the selected Scene. You can have image overlays, multiple webcams, text overlays, or various audio sources. As of v26.1.0, OBS does not support audio interfacing through the virtual webcam, so you don't have to worry about it unless you will record your stream or use a third party virtual webcam plugin that supports audio. If that's what you want, you will need to install NDI tools and set up the OBS Plug-in for it. We will look into audio streaming in a moment.
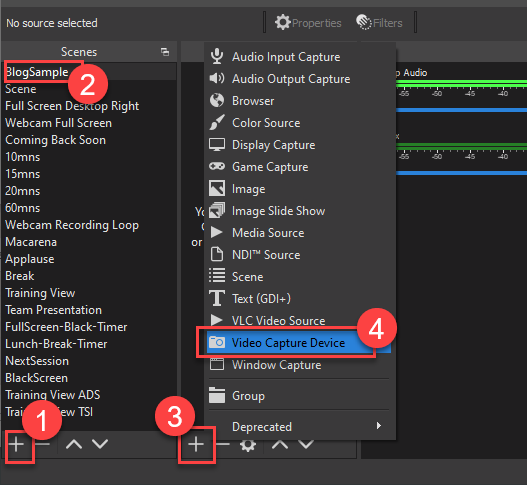
Now create a new scene (1), give it a name, and add a Video Capture Device (4). OBS will ask you to choose what webcam you want to use. Select the one you prefer and save. This will give you a scene with your webcam input on the screen. You can move, resize, and transform the webcam visual as you desire. What I really like, is to prepare transparent PNG files with whatever I want to put on screen and overlay that on top of the webcam with an Image control in the same scene.
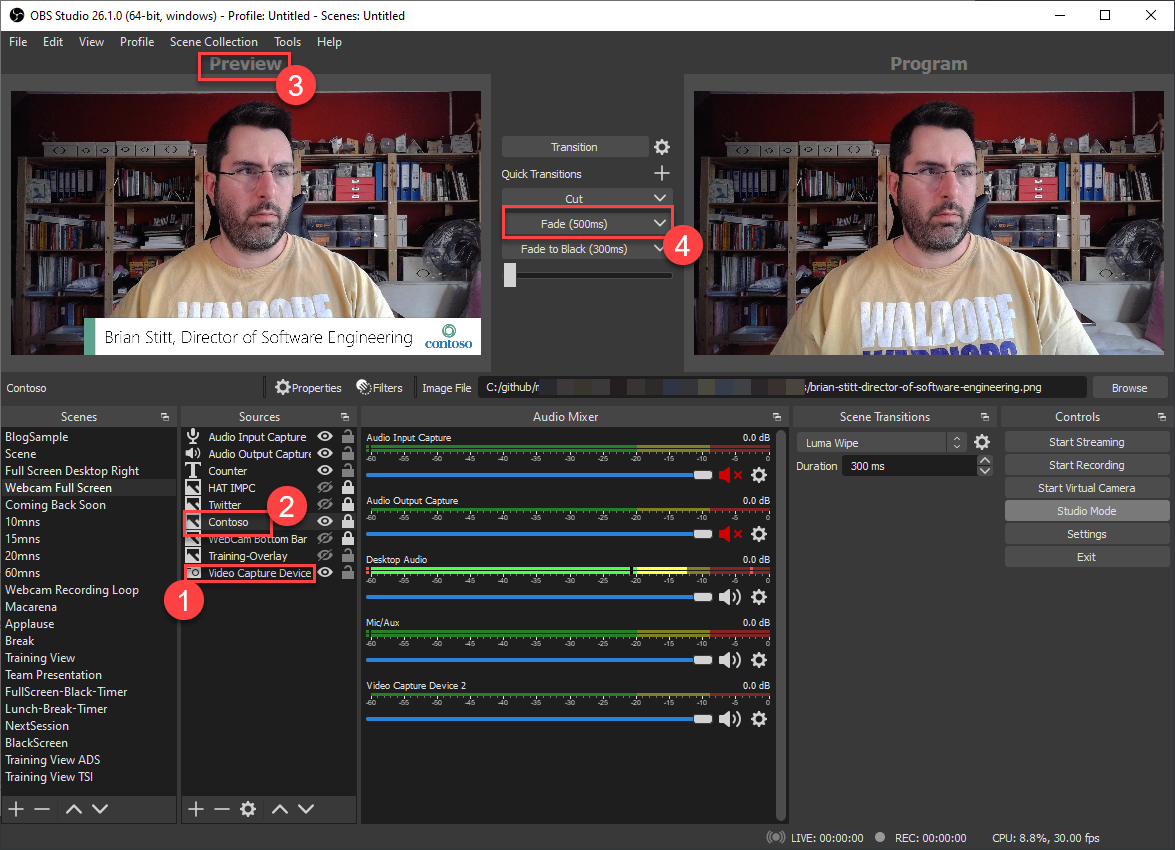
Look at the highlighted sections in the above screenshot. I have my webcam (1) and a PNG file (2) on my scene. However, the PNG is only visible in the Preview (3) pane. At this point, the PNG is not visible in the actual webcam stream. We have to select Fade (500ms) (4) to transition the left scene to the right. Next, you can disable the visibility of the PNG in the sources list and observe that it only applies to the preview pane. The studio mode helps you transition between micro-adjustment without the need to create separate scenes. Finally, I suggest you create a new scene with a Display Capture source in it and test scene transitions, the same way we previously transitioned between different states of the PNG.
Timers With Snaz
If you are delivering online training, you know timers are critical :) Having a countdown on screens helps timing breaks, session slots, and overall helps keep up with the schedule. OBS does not have a timer feature, but it can show text from a text file :) Please, welcome Snaz. Snaz offers a crazy amount of options when it comes to timers. The app can flush the timer text into a text file to hook up with OBS and show on the screen.
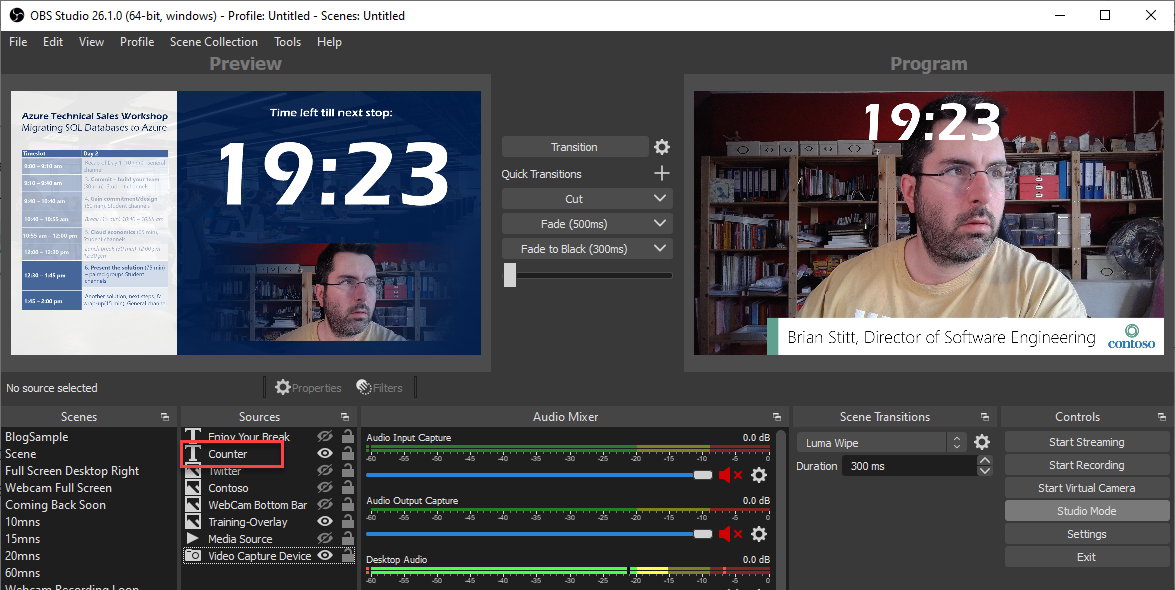
When you add a new text source to your scene make sure you select Read from file and pick the file Snaz creates for you. Once you start the timer in Snaz, you will see the text change in OBS. That's it. Now you have a timer you can put wherever you want. You can see two examples of Snaz in the above screenshot. On the right, I have the timer on top of my head. This is when I talk, but I still want to give a sense of the time left in the current slot. On the left, in the preview pane, you can see a more elaborate design. It has the day's schedule and some background texture with a transparent section where my webcam can come through. All that is a single PNG file. The timer comes to the top from Snaz, and my webcam is positioned behind all that, where the PNG is transparent.
Get Some Music On
You might want to play some music during breaks :) get some requests as a DJ maybe? Unfortunately, you can't do that with the default OBS virtual webcam. Go ahead and install NDI tools. Set up the OBS Plug-in for it.
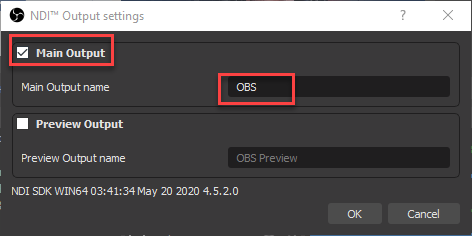
In OBS, go to Tools / Options menu and enable Main Output. The main output name is the one we will pick with NDI Virtual Input. Search for NDI Virtual Input from your start menu and start it.
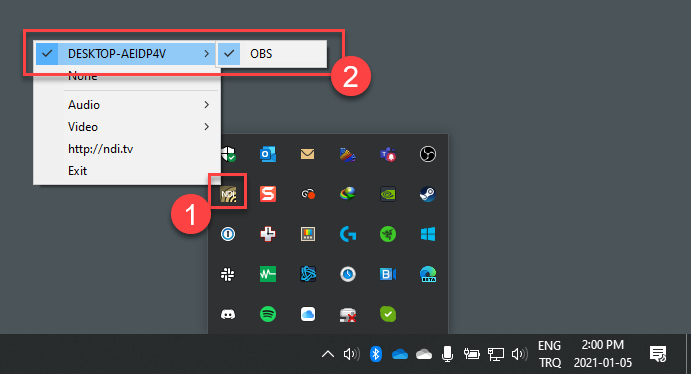
You can find NDI in your tray (1). Right-click, select your PC name and the output name (2).
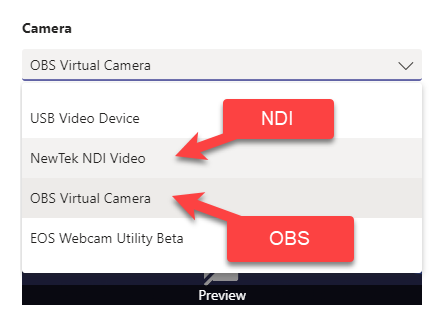
Now, in every app on your PC, you will see two virtual webcams :) One from OBS and another through NDI. The nice thing is that NDI has Audio support as well.
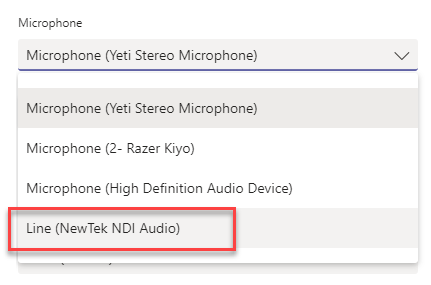
Select Line (NewTek NDI Audio) to get your audio from OBS to the conferencing tool of your choice. This will help us pass through Windows desktop audio through OBS into the virtual microphone to Zoom, Teams, or Skype. Before you test things out, make sure you disable noise suppression functionality in the conferencing tool. They react a little weird with music coming through the line :)
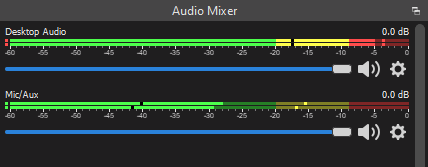
Here is a look at how different audio sources look in OBS. You can set volume or mute each channel. Now that we have audio passing through NDI, we can open up Spotify and play some music.
Noise Suppression
One lovely, hidden gem in OBS is the RNNoise, a noise suppression library based on a recurrent neural network that can be used for audio noise reduction.
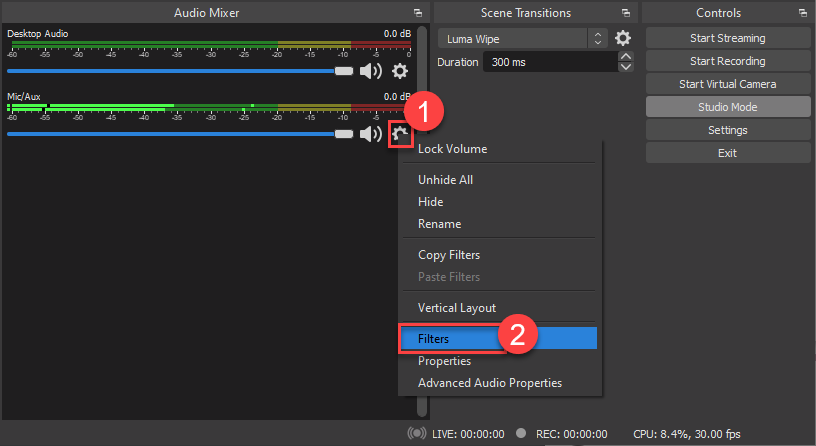
You can add RNNoise as a filter (2) to your Microphone output that passes through OBS if you use the NDI tools. So far, I have found RNNoise to be much better than any noise cancellation offered in any of the conferencing tools.
I hope these tools and tricks help you increase the quality of your next online meeting. Enjoy ;)
Simultaneous Local Recording
While you do your streaming, you can simultaneously record to your PC as well. The result will have a much higher quality image than a recording you can download from Teams or Zoom.
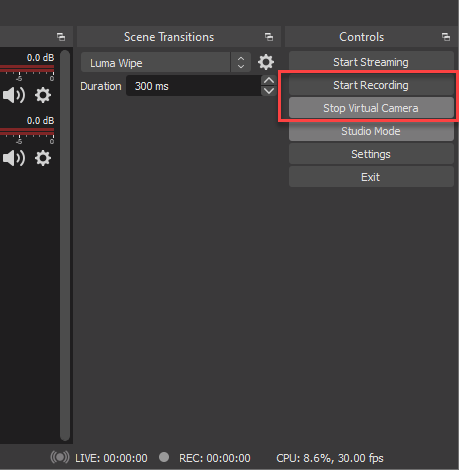
Select Start Recording to record all that's going on in your outgoing stream. With that said, keep in mind that OBS will only record what goes through OBS. It will not record someone else's webcam in your meeting unless you decide to capture that through desktop sharing, which will be weird because they will see it through your webcam. So, the local recording is not a replacement for interactive sessions but an excellent, high-quality local recording option if you are presenting in a one-way style.
Resources

The first step starts with you
Get in touch!
The bigger the challenge, the more excited we get. Don’t be shy, throw it at us. We live to build solutions that work for you now and into the future. Get to know more about who we are, what we do, and the resources on our site. Drop a line and let’s connect.